Getting Started with e-Safe Compliance 4.0 (Step-by-step Guide)
|
Getting Started with e-Safe Compliance 4.0 (Step-by-step Guide) |
|
|
|
Now that you have installed or probably have performed some maintenance actions for e-Safe Compliance™, you need to set up e-Safe Compliance™ to perform basic functional actions for your network. Follow the steps below to perform the functional actions.
To login to Webadmin, enter the User Login as "sa" and Password as "fs". These are the default values for Webadmin Login details, you can create new login details once you login with the default value. Please refer to Login Section for more administrative functions.
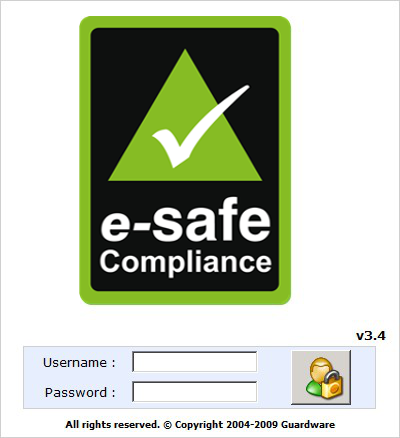
Fig. 1.01 e-Safe Compliance Webadmin Login Screen
Now that you have login to e-Safe Compliance 3 Webadmin, e-Safe Compliance 3 Summary Panel appears to show the summary of violations to date, close this panel and click on General Settings icon on Settings Panel by the left hand side of the main page.
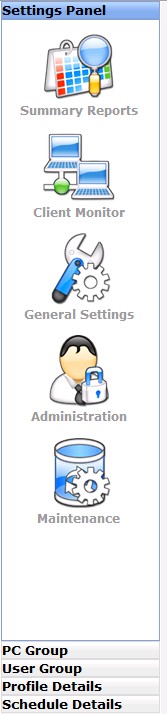
Fig. 1.02 e-Safe Compliance Webadmin Main Components in Settings Panel
Now that you have clicked the General Settings icon, you should see the following links at the Top most section of the resulting screen as shown in the figure below:
![]()
Fig. 1.03 General Settings panel with functional links
PcGroup: If your network users are identified based on PC names, then you might want to put set of PCs together in different groups, therefore having "PC Groups". With PcGroup Panel you can Add, Edit, and Delete PC groups (Group Control) as required, PC(s) in each PC group can also be assigned to another PC group on your network by choosing the "Assign PC(s)" tab. The PC(s) group panel is shown by default on access to general settings panel.
UserGroup: If your network users are identified based on network or computer user names, then you might want to put set of users together in different groups, therefore having "User Groups". With UserGroup Panel you can Add, Edit, and Delete User groups (Group Control) as required, Users(s) in each User group can also be assigned to another User group on your network by choosing the "Assign User(s)" tab.
Profile: e-Safe Compliance will be set up for your network according to Profiles created.
Schedule: You can specify when you want the created profiles or specific events to take effect on your network by creating different schedules.
In the "Add PC Group" panel enter the group details as preferred by you, if you have already created a Profile Schedule as well as Event Schedule, select them as appropriate in the Group Schedule panel, otherwise you may proceed to create schedules as required. Please refer to General Settings Section to learn more on PC Group.

Fig. 1.04 PC Group Panel
In the "Add User Group" panel enter the group details as preferred by you, you can only select Profile Schedule for User(s) Group, if you have already created a Profile Schedule, select as appropriate in the Group Schedule panel, otherwise you may proceed to create a new Profile Schedules as appropriate. Please refer to General Settings Section to learn more on User Group.
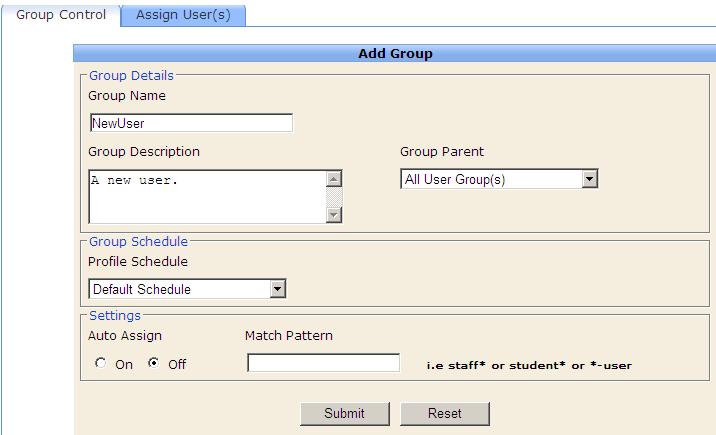
Fig. 1.05 User Group Panel
As stated above, upon creating either PC or User groups you may want to assign PC(s) or User(s) to the either of the groups created, to perform this function, select the Assign PC(s) or Assign User(s) tab as the case may be, the resulting screen should be as shown in the figures below for both PC and User Groups.
/Assign%20PC(s).jpg)
Fig. 1.06 A single PC (SHIMA-PC) is assigned to created PC group (NewGroup)
/Assign%20Users.jpg)
Fig. 1.07 A single user (RND:RND-PC) is assigned to created User group (NewUser).
So far, you have created different groups and you probably have assigned your network facilities (i.e. PCs and Users) to either of the group categories. Now, you need to create Profile(s) to specify what action e-Safe Compliance should perform on your network facilities. Note that this will depend on your specified Profile Settings that will be done after creating a profile . Take the following steps to create profile:
For other details that can be performed for Profile, please refer to General Settings Section to learn more on Profile.
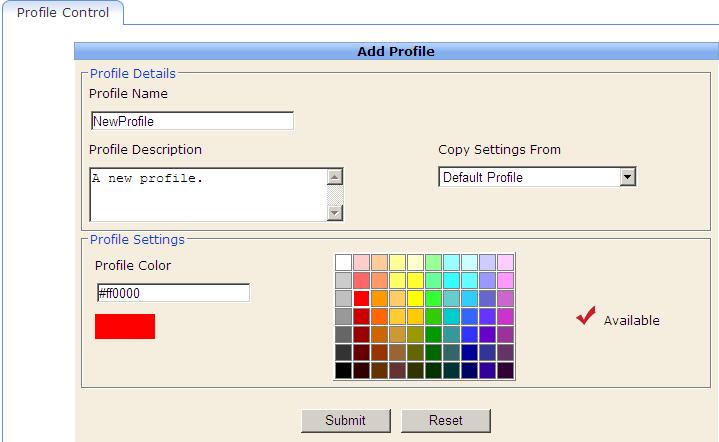
Fig. 1.08 Panel Control panel
Now that you have created a profile, you need to create a schedule to be attached to the created profile as shown in the figure below, e-Safe Compliance enables you to create Profile Schedule and Event Schedule as appropriate, Event Schedule enables e-Safe Compliance actions to be based on particular time to perform such actions while Profile Schedule enables e-Safe Compliance actions to be based on Profile Settings. Follow the steps below to create Schedule:
Select a Schedule Type (i.e. Event or Profile)
Select the created Profile (If you have created a profile, it should be displayed in the "Schedule Profile (Default)" combo box).
Enter a name for this new Schedule.
Give a brief description about the schedule (e.g. This is for peak period, idle PCs should be shut down)
Click the Submit button to complete this process.

Fig. 1.09(a) Schedule Control panel for Profile Schedule
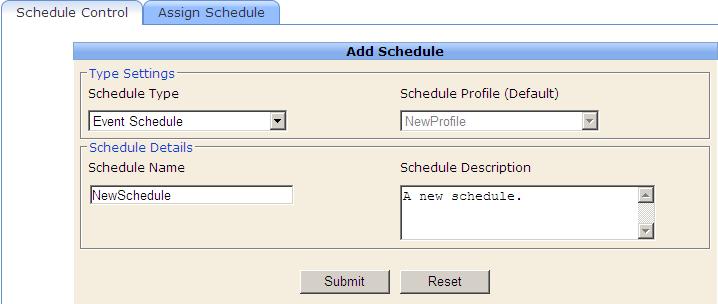
Fig. 1.09(b) Schedule Control panel for Event Schedule
At this point, you will recall that you have created a profile which has also been attached to a created schedule, now the created schedule needs to be assigned to any of the groups on your network (i.e. PC or User groups). Take the following steps to assign a schedule:
Select the "Assign Schedule" tab
Select an assign panel option from either "Assign to PC Group" or "Assign to User Group"
For PC Group, select a PC group from the "PC Group" combo box.
Select your created "Profile Schedule" and/or "Event Schedule" as the case may be, otherwise leave as default.
For User Group, you can only select Profile Schedule.
Click the "Submit" button to complete this process.
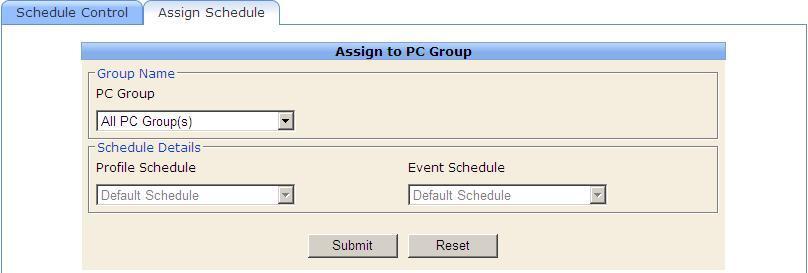
Fig. 1.10 Assign Schedule to PC group
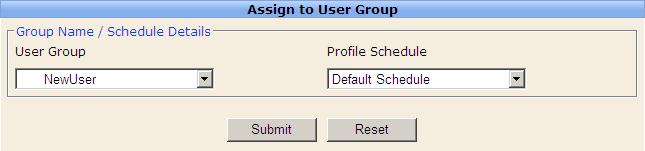
Fig. 1.11 Assign Schedule to User group
Now you need to make settings for your created profile(s) with respect to the groups you have attached to such profile(s). In this regard, you can make different Profile Settings for different groups on your network according to your organization policies so that e-Safe Compliance can treat each group according to the attached profile (i.e. "Junior Staff" group may have Very Strict profile to account for high productivity while "Senior Staff " group may have ordinary profile), the same is also applicable to Schedule Settings as will be described shortly. Please refer to Profile Settings Section to learn more on Profile Settings. Follow the steps below to make basic profile settings:
From the settings panel, select the "Profile Details" tab as shown in the figure below.
Expand the "All Profile(s)" Tree Node, you should see your created profile(s) here.
Select the particular profile (e.g. Non-Work as appeared in the figure below), you should see the resulting screen on the main center screen labeled "Detailed Profile Settings - [Your Profile (e.g. Non-Work)]".
On this panel there are three (3) tabs, the "Settings" tab is selected by default and it enables you to give basic settings that control the e-Safe Compliance engine. Make settings as required here, then click the "Submit" button below the screen, you may need to refer to e-Safe Compliance Help File to learn more on each panel functions for Profile Settings.
Select the "Messages" tab to see if you need to customize e-Safe Compliance action messages otherwise you may leave as default.
Select the "List" tab to make list(s) of Good and Bad IP(s), Domain(s), Web Addresses, and Web/Key categories. You may need to refer to List Management Section to learn more on "List Management".
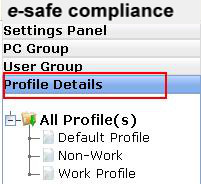
Fig. 1.12 Profile Details tab from Settings Panel

Fig. 1.13 Active Monitor Profile Settings for "Work Profile"
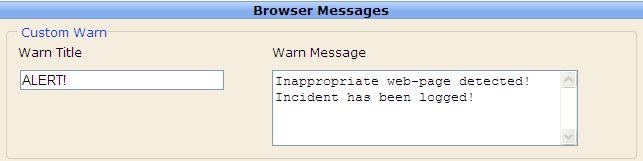
Fig. 1.14 Customizable Warn Message for Inappropriate Web page

Fig. 1.15 Whitelist for allowable web addresses or domain
Created Schedules needs to be set for specific performances or actions according to time otherwise default settings for schedule will be used. If you have created either of Profile Schedule(s) or Event Schedule(s) then you need to specify what time either or both schedules will take effect on your network. Please refer to Schedule Details Section to learn more on Schedule Details. Follow the steps below to assign schedule(s):
For Profile Schedule:
From the Settings Panel, select the "Schedule Details" tab as shown in the figure below.
If you have created Profile Schedule then expand the "Profile Schedule" tree node, you should see your created schedule(s) here.
Select the particular schedule you wish to assign from the tree components (e.g. "Work Schedule" from Profile Schedule as in the figure below).
The resulting screen shows group of cells in rows and columns against week days and time in one hour range, right click on a particular cell under the preferred week day and time, then select "Assign Profile".
From the resulting screen (Profile Schedule Assignment) select the range of time you wish an action be performed (e.g. 11:05 - 11:35), note that you have to select within an hour range.
You can change the profile this schedule is to be assigned to, by default it should the tree component you have selected.
The day specified is as a result of the column of the cell you have selected, if you prefer otherwise close the the Profile Schedule Assignment panel and select a different cell under your required week day and time.
If you have made the appropriate selections, click the "Assign" button, you may get an alert message for "Time Range Already Assigned" if there has been a previous schedule assigned to this time. Select the previous time range from the text field on the right hand side of the screen and click Delete, you may also chose "Delete All" if you wish to delete all previous schedules and assign set of new schedules.
If you have been able to assign scheule(s) as required, then click the "Save" button to enable schedule(s) take effect.
For Event Schedule:
If you have created Event Schedule then expand the "Event Schedule" tree node, you should see your created schedule(s) here.
Select the particular schedule you wish to assign from the tree components (e.g. "Event Work" from Event Schedule as in the figure below).
The resulting screen shows group of cells in rows and columns against week days and time in one hour range, right click on a particular cell under the preferred week day and time, then select "Assign Event".
From the resulting screen (Event Schedule Assignment) select the event type (e.g. "File Scan")
The Event day specified is as a result of the column of the cell you have selected, if you prefer otherwise close the the Event Schedule Assignment panel and select a different cell under your required week day and time.
Select the Event Time (i.e. What time of the day selected you want e-Safe Compliance to perform the event action)
In the Event Options, you can specify additional actions or customize actions to be performed by the event.
If you have made the appropriate selections, click the "Assign" button, you may get an alert message for "Event Already Assigned" if there has been a previous event assigned to this time. Select the previous time range from the text field on the right hand side of the screen and click Delete, you may also chose "Delete All" if you wish to delete all previous event schedule(s) and assign set of new event schedule(s).
If you have been able to assign event schedule(s) as required, then click the "Save" button to enable event schedule(s) take effect.
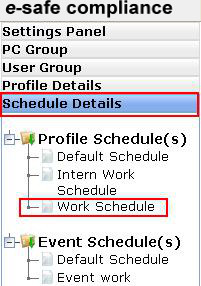
Fig. 1.16 Schedule Details tab from Settings Panel
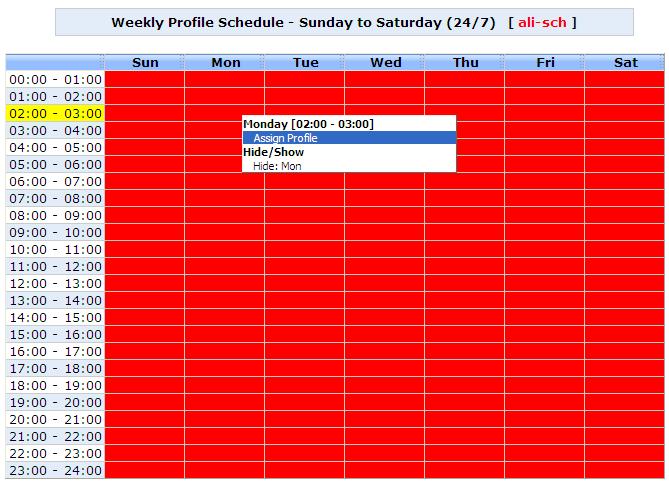
Fig. 1.17 Right click to Assign Profile
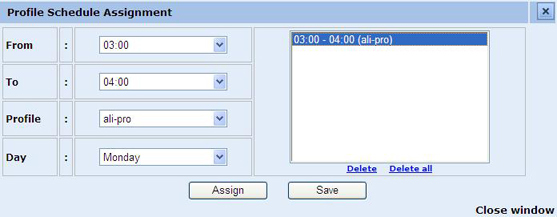
Fig. 1.18 Assign Time Range for Profile
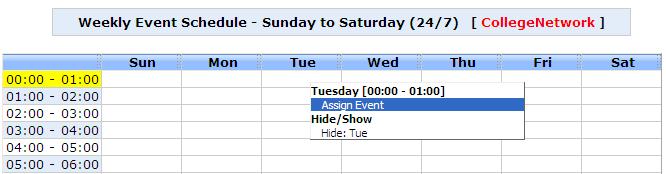
Fig. 1.19 Right click to Assign Event
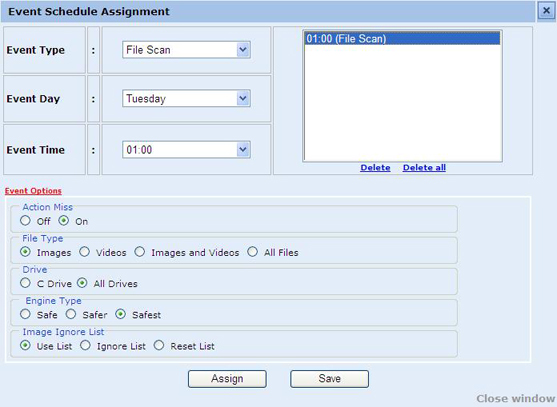
Fig. 1.20 Additional Event Options
Now that you have completed all settings for both profiles and schedules assigned to groups on your network, you need to alert your network clients (PCs) to receive all the settings you have made, this should take less than 2 minutes depending on your network load and speed. Please refer to Client Monitor Section to learn more on Client Monitor.Take the following steps to update your clients:
Click the "Client Monitor" icon from the Settings Panel as shown in the figure below.
The resulting screen should display all PCs on your network by default, you can also select your preferred group by using the "Advanced Search" tab to search for your preferred clients under a particular group.
If you have selected your preferred group and you can see your clients (PCs) displayed on the main screen, right click any of the clients and select "Update" for that particular client only, if you must update all clients then select "Update All Clients".
For offline PCs you may receive a message alert stating that "Offline PCs will be updated once they are online". Ensure that your network PCs are installed with e-Safe Compliance client software as appropriate, you can also change the refresh duration so that clients (PCs) can get online faster.
Now your clients should have received e-Safe Compliance settings and should be performing the expected functions.
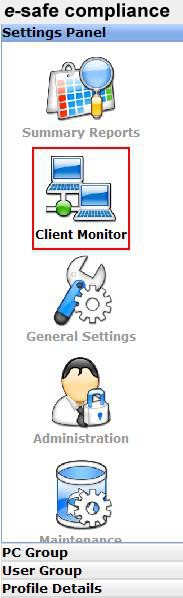
Fig. 1.21 Accessing Client Monitor Control Panel
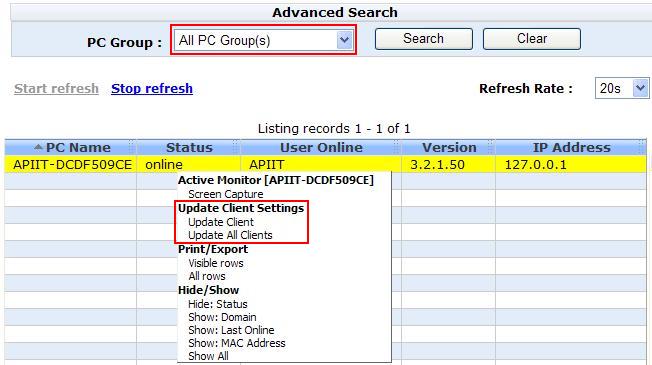
Fig. 1.22 Update Client Settings
|
|
| © 2004-2008 Guardware e-Safe Compliance™ | Please download the complete help here . |
|